Make Your Own Cheese With a Cheese Making Kit

cheesemakingI was thinking about the foods that my family loves the most. A common ingredient in many of them is CHEESE. Well, cheese is quite yummy, but how can you store it in a survival pantry? It looks like I would have to learn to make it myself.

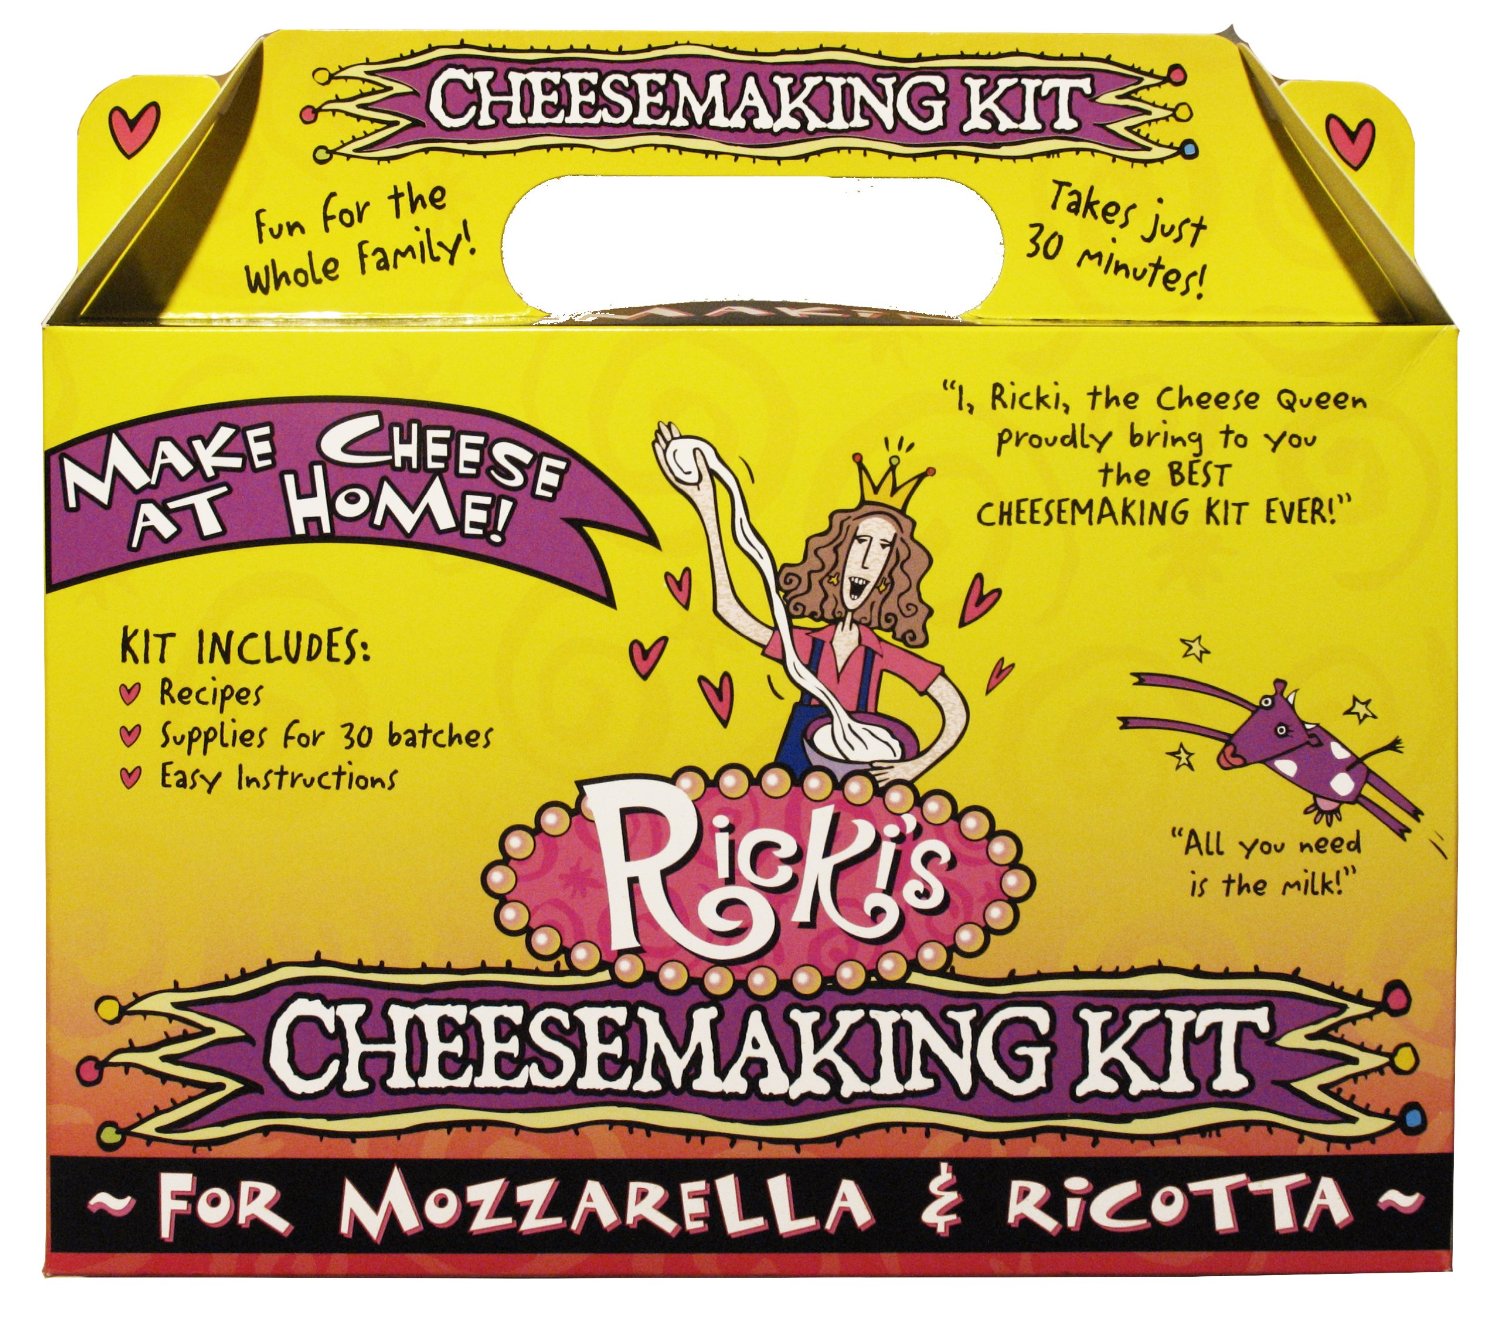
Making my own cheese is not impossible.  But how much effort do I want to put in to the fine art of cheese making? I decided start with simple cheeses like Mozzarella and Ricotta, using “Ricki’s Cheese Making Kit.” Since mozzarella and ricotta can be used in so many dishes, I’m sure you will have no trouble at all using the cheese up. Add to salads, sandwiches or Panini, pasta dishes, or eat plain. Mozzarella and Ricotta contain Protein, Calcium, Vitamin A and B 12. Granted, it also contains Fat, but we need fat for brain function. So they is a healthy addition to the diet.

This kit is entry level cheese making (it comes in a cartoon box), so don’t go expecting to open your own cheese shop next week. The” Ricki’s Cheese maker Kit” is straightforward, just follow the directions. The kit comes with enough rennet and citric acid to make around 30 pounds of cheese (not all at once, about a pound at a time).  You can order more rennet powder to make more cheese. It also contains cheesecloth, cheese salt, and detailed instructions.

cheesemakingI chose this kit because you can make the cheese with different types of milk: cow or goat. Also, it is possible to make cheese from powdered milk. This makes it ideal for the Prepper pantry (especially if you don’t have your own cow). If you are using powdered milk, you have to add cream, but cream is sold in shelf stable packages that don’t need refrigeration. You will need a gallon of milk to make a batch of cheese. Read the instructions carefully to make sure you get the right milk… ultrapasturized will not work.

My daughter and I have been working with the kit to see just how easy it is, and if it actually works. Our first attempt was a bit of a disappointment. The Mozzarella was too grainy. Because we split our curds in half, it wasn’t a total loss. We did manage to make some delicious spread cheese (like a cream cheese).  By the next batch, we had figured it out. Our cheese was actually cheese textured! And it tasted good.

Cheesemaking
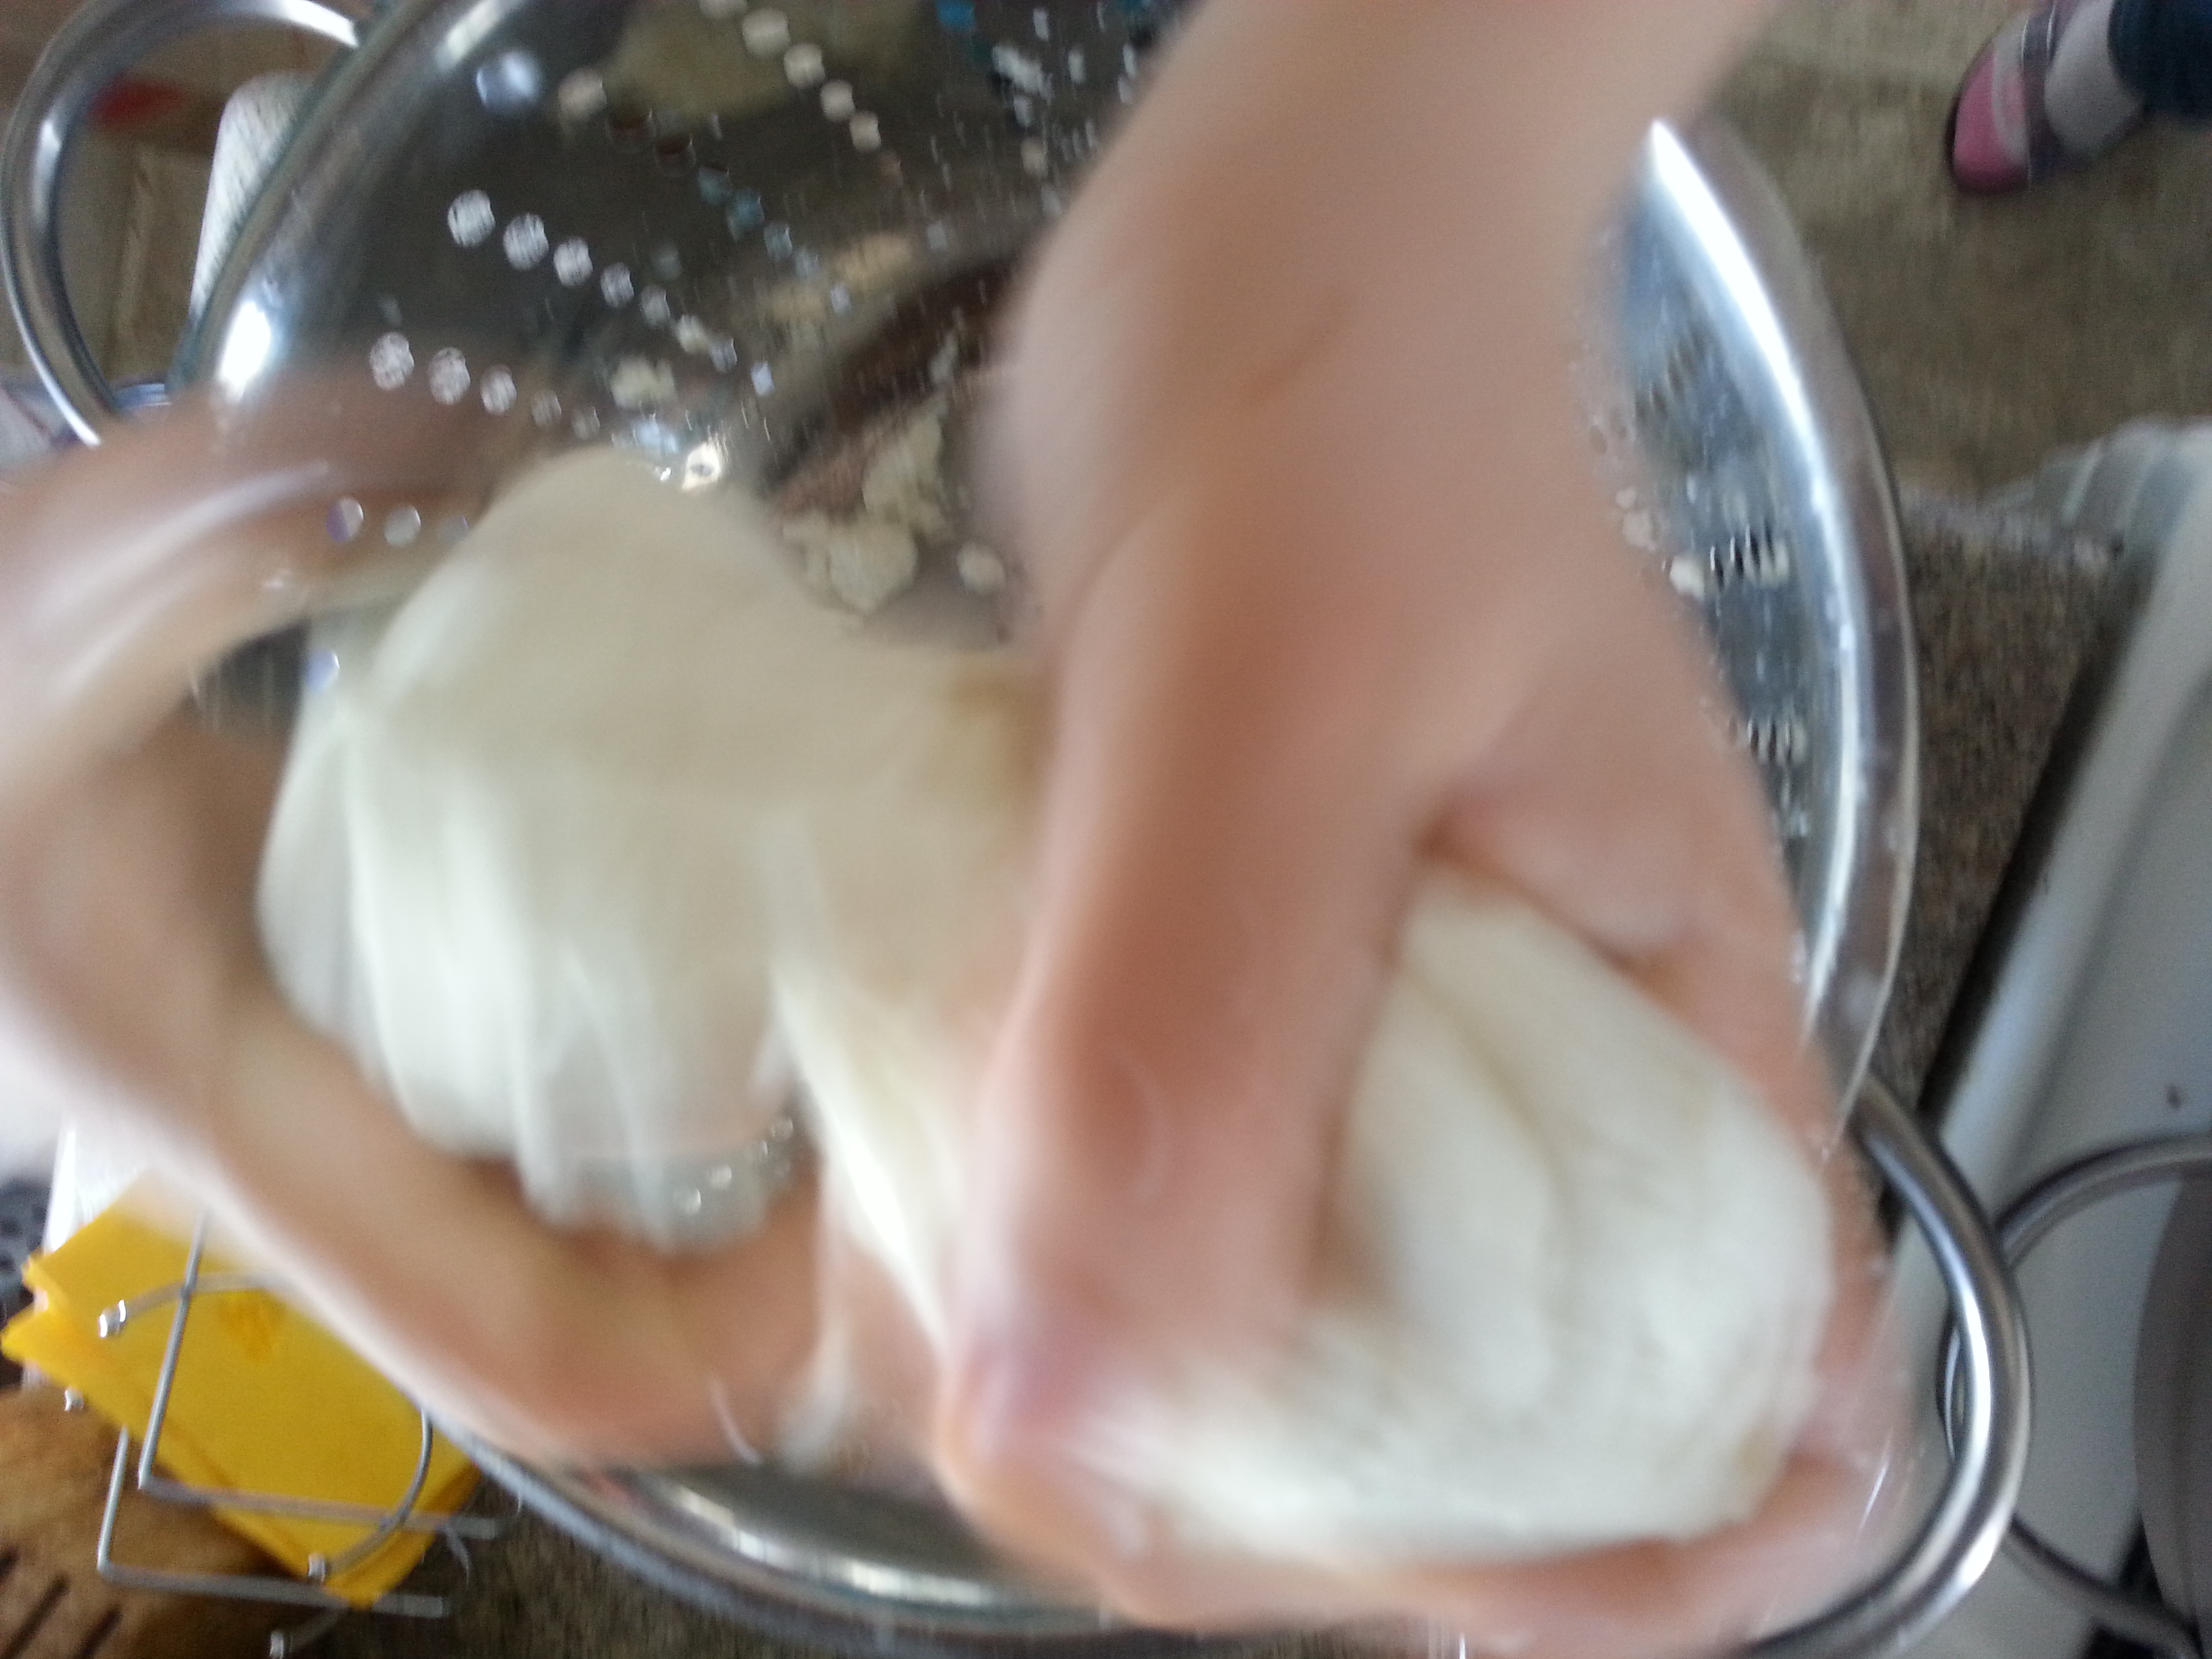
After you get comfortable with the cheese making process, you can even try adding new flavors. Adding chopped herbs from your garden makes the cheese taste delicious, and a bit of liquid smoke gives the mozzarella a wonderful smoky flavor.

Now that my daughter and I are basic cheese makers, we know that we will never have to give up on homemade lasagna! Give “Ricki’s Cheese Making Kit” a try, and add something special to your pantry.


 Here is the instruction for making cheese on the stovetop without the microwave-

http://www.cheesemaking.com/includes/modules/jwallace/chspgs/9mozz_nonuke/index.html


Here is the link to making the cheese with Dry Milk and Cream

http://www.cheesemaking.com/store/pg/262-MozzarellaDryMilk.html


[notice]This article is just one part of the puzzle, many more Prepper information articles and product reviews are available on the Back40 Blog. Learn about essential Prepper Supplies, gardening (survival seeds), stockpiling toolsthe best goods for Barter, keeping your pantry up to date, and taking care of your family in an emergency. (Don’t be overwhelmed…. let Back40 help you survive.)[/notice]


Enhanced by Zemanta

Permanent link to this article: https://back40hq.com/make-cheese-cheese-making-kit/

Using a Whetstone -A Knife is Only as Good as its Edge

whetstone“Always take care of your tools” was a mantra that my father drummed into me from early on. Keep them clean, put them away after using them, treat them well, and they will work for you. Dad would set aside time every week to maintain his tools. On Saturday mornings he would pull out the whetstone and work his knife blade until it was sharp enough to shave the hair on his arms. Over the years, that smooth whetstone started to wear down a bit, curving where he used it, but it never wore out. And it kept his knives, the tools of his trade, honed to a fine sharpness.

You can have the fanciest knife with the coolest handle and fabulous pedigree, but, it isn’t worth anything if it’s dull. A dull knife can be dangerous. A dull knife is just a piece of metal with a handle.

Keeping your knife sharp and in good condition doesn’t require lots of fancy equipment….just a whetstone (sharpening stone), a bit of lubricant (water or mineral oil) and some know how.

How to sharpen your knife using a whetstone-

  1. Most whetstones have a rough side and a fine grained side. You can feel the difference by rubbing a thumbnail against it. If your knife is particularly dull, start with the rough side, otherwise, just go with the fine.whetstone1
  2. Wet the stone well with water or mineral oil. Mineral oil will help keep the knife blade clean, but it isn’t absolutely necessary. Water works, and may be more available in the field.
  3. Hold the knife blade against the stone at a 15-20% angle. Some people prefer to pull the knife against the stone towards them; others pull away… totally up to you.whetstone
  4. Give the knife blade 5 or 6 easy strokes on one side (you aren’t trying to go THROUGH the stone). Work it at an angle to get the length of the blade. Flip over and do the same for the other side.
  5. Alternate back and forth, one side then the other, for a few more stokes.
  6. If you started on the rough side, switch over to the fine grained side now and repeat.
  7. Test for sharpness.

If you use your knife frequently, you should sharpen it once a week. Remember, take care of your tools, and they will take care of you. A great Basic Whetstone to get you started is made by Winco. It has a fine and a medium edge, It should last a lifetime.

[notice]This article is just one part of the puzzle, many more Prepper information articles and product reviews are available on the Back40 Blog. Learn about essential Prepper Suppliesgardening (survival seeds)stockpiling toolsthe best goods for Barter, keeping your pantry up to date, and taking care of your family in an emergency. (Don’t be overwhelmed…. let Back40 help you survive.)[/notice]


Permanent link to this article: https://back40hq.com/using-whetstone-knife-good-edge/

Grow Vegetables That Only Need 30 Days From Seed to Table

Radish

I’m not the most patient gardener. Waiting for seeds to come up and actually become something edible is tough for me. Every day I look at my garden and wait for something ANYTHING to happen. Over the years I learned to grow vegetables that are ready fast! While it’s not instant satisfaction, I do get a chance to harvest and eat a few vegetables in around a month. This is enough to tide me over until everything else in my garden begins to ripen!

If, for whatever reason, you are looking for a quick harvest, consider planting these vegetables in your garden. Not only will you get to eat them sooner, you will also have the opportunity to take advantage of a second or third crop!


radish


Radishes– These little red globes of crunch grow fast! Radishes are loaded with vitamin C and fiber, which makes them great for you. In Eastern medicine, radishes are eaten to eliminate toxins in the body. You can eat them raw, in salads, pickled, or even braised.


baby kale


Baby Kale– Baby Kale is the same as regular Kale; you just harvest it a bit early. This superfood is loaded with magnesium, iron, folate, calcium and vitamin A. The tender leaves are delicious in a salad, but I prefer to stir them into a nice bean soup.


green onion


Green Onions– Because they don’t have to develop big bulbs, you can harvest and eat green onions in 30 days. They are loaded with Vitamin K, Vitamin A and Calcium, which means they are good for heart and eye health. Eat them raw in salads, or stir fry them with other vegetables  or meats. My family loves them on pizza.


baby lettuce


Lettuce- Granted, you won’t have a big head of lettuce in 30 days, but you can harvest some lettuce leaves. Lettuce is low fat and low calorie, but it is high in Vitamin A, and contains Vitamin C.Toss in a salad with herbs and other greens for a refreshing and light treat.


carrots


Baby Carrots– Again, a regular sized carrot will take a bit longer to grow up, but you can eat carrots when they are still babies. If you find yourself “thinning” your carrot rows, set aside the ones you pull up. Carrots are loaded with Beta Carotene, and are great for your eyes. Eat them as you would regular carrots… they are just smaller.


baby bok choy


Bok Choy– Bok Choy greens can be harvested and eaten early. It contains Potassium, fiber, Vitamin A and Vitamin C.  Take some of the outer leaves, and add them to stir fries or soups.


sprouts


Of course, if you are SUPER IMPATIENT, or just in a hurry to get some fresh nutrition, you can grow sprouts. They don’t need soil, and they are ready to eat in just days!!


Enjoy your veggies sooner by planting seeds that grow into delicious foods in just 30 days!

all photos courtesy of Wikipedia


[notice]This article is just one part of the puzzle, many more Prepper information articles and product reviews are available on the Back40 Blog. Learn about essential Prepper Suppliesgardening (survival seeds)stockpiling toolsthe best goods for Barter, keeping your pantry up to date, and taking care of your family in an emergency. (Don’t be overwhelmed…. let Back40 help you survive.)[/notice]

Permanent link to this article: https://back40hq.com/grow-vegetables-need-30-days-seed-table/

Home Made Kettlecorn Recipe


popcorn
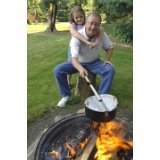
You don’t need to go to the Fair to enjoy delicious Kettle Corn! If you have a Whirly Pop Popcorn Popper, you can be munching on Home made Kettlecorn in minutes!

Ingredients-

¼ cup Oil (some people like peanut oil, others claim coconut oil is the only way…vegetable oil works)

½ cup Popping Corn

¼ cup Granulated Sugar

1 tsp. Salt

Instructions-
Add the Oil and popping corn to the Whirly Popcorn Popper over medium heat. Have the sugar ready. Stir while the popcorn heats up. As soon as it starts to pop, pour the sugar into the popper, and continue stirring. Keep stirring until it stops popping.

Pour the sweetened popcorn out into a bowl… sprinkle some of the salt over it, stir it well…sprinkle the rest of the salt over it.

Eat.

Permanent link to this article: https://back40hq.com/home-made-kettlecorn-recipe/

Popcorn Popper Review

whirly popWe are huge popcorn fans in our home. It’s an inexpensive snack that’s actually not bad for you (unless, of course, you slather on the butter). Because popping corn can be stored, I buy in bulk, and repackage it for use and for stockpile. In a cool dark place, popcorn will last indefinitely.

But… what’s the best way to make popcorn? If the power goes out, those little microwave packets are useless. We have 2 different poppers… and both get fairly regular use.

My favorite is the The Original Whirley Pop Stovetop Popcorn Popper by Wabash Farms. Just put in a bit of oil and popcorn, and set it on the stovetop. You can stir the popcorn with the crank (this is a perfect job for a child). Keep cranking until it gets too difficult, and then shake until it stops popping.

The top of the popper has a split opening. One side clips on; the other side lifts open easily. This keeps the popcorn from flying around the room. Pour your popped corn in a bowl, and season to taste (the purist in me loves plain salt).

One thing I have noticed… much like cast iron, you don’t want to scrub your popper out. Over time, it develops a patina of sorts that makes the popper work more efficiently. Wipe it out with a towel (and get the goop out of the gears), and you won’t burn your corn.openfire popper

Now, if you are cooking outside over an open campfire, and you left your asbestos suit in your other bag, you can use the Open Fire Pop Popcorn Popper, also by Wabash Valley Farms. The telescoping handle means that you can keep yourself at a safe distance while making a snack.

The Open Fire popper is easy to clean (just wipe out with a towel), and makes delicious popcorn. My only complaint is that the handle seems a little flimsy. So far I haven’t had any breakage issues though.

Try making popcorn the old fashioned way… over flame… and you will never buy those microwave packets again.
Wabash Valley Farms 25008 Whirley-Pop Stovetop Popcorn Popperwhirley popcorn maker

Open Fire Pop Popcorn Popperopen fire popcorn popper

Imagine having this tool in your kit!

I am a big fan of small and easy to use tools that I can stach away for just when I need them to solve a problem in time of need. I have a small multi tool knife, fire starter, mirror, and so on. But how about this one?

A multi tool the size of a business card. 

Permanent link to this article: https://back40hq.com/popcorn-popper-review/

Dry Ice Method for Sealing a Food Bucket

Sealing a Food Bucket
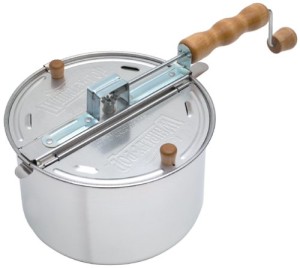
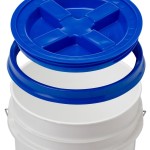
Sealing a food bucket using dry ice

If your plan is to store buckets of grain for the long term, you need to insure that your precious stockpile is not affected by oxygen. You can use Oxygen Absorbers for small packets, but if you want to efficiently remove the oxygen from a bucket, there is a more efficient method- Dry Ice.

First the science lesson… what is Dry Ice? Dry Ice is frozen Carbon Dioxide. It looks quite similar to frozen water, with one key difference. When regular ice melts, it turns to liquid (which can then be turned to gas by adding heat). Dry Ice does not melt into liquid, it Sublimates, which means it goes from frozen to gas without turning into liquid first. This means you can use dry ice to freeze things, without ending up with a puddle. (You can also use it to put on a great Halloween show in your yard….) So, if you add Dry Ice to your bucket of grain, the Carbon Dioxide, which is heavier than Oxygen, will push the oxygen out of the bucket. You just tighten the lid, and the bucket will seal itself.


The Dry Ice Storage Method-
You will need

-5 gallon Food Grade Storage Bucket, with a lid that seals.

-1 oz of Dry Ice per gallon, so a 5 gallon bucket will need 5 oz.

-1-3 Desiccant packets (ex. food grade silicone packets)

-gloves

Using the gloves (Dry Ice is -109.3degrees F. DO NOT TOUCH IT BAREHANDED) place the dry ice into the bottom of the bucket. Pour your grains into the bucket all the way to the top. Add a desiccant packet to remove any residual moisture. You do NOT have to cover the dry ice or protect the grain in any way.

Put the lid on the bucket, but leave it open just a bit. This will allow the CO2 to escape. After a few minutes, feel the bottom of the bucket. If it is no longer cold, seal the bucket the rest of the way. (If it’s cold, give it another few minutes).

Keep an eye on the bucket for an hour or so… if you see the bucket bulging, release the pressure by opening it, then seal it again.

Your grains will stay safe in an oxygen free environment for as long as you need them.


NOTE- Your grains will not be affected by the Carbon Dioxide! They will absorb it while in the bucket, but the gas will be released as soon as the bucket is opened.

Use MORE desiccant packets if it is humid, you can use fewer if it’s dry.

WARNING- Dry Ice is -109.3 degrees F. This is VERY COLD. Touching Dry Ice with bare hands will cause burns. WEAR GLOVES when handling dry ice.

Where Can You Find Dry Ice? – Check your phone book under Dry Ice. Your local Ice cream shops, welding supply shops, ice houses, and meat packers will use it, so you could check with them. Hospitals also use dry ice in their laboratories, call and ask who their supplier is. It’s not that difficult to find.

 Sealing a Food Bucket

Silica Gel Desiccants 2-1/4 x 1 1/2 Inches – 25 Silica Gel Packets of 10 Grams Each by Dry-Packs
5 Gallon White Bucket & Lid – Set of 3 – Durable 90 Mil All Purpose Pail – Food Grade – BPA Free Plastic –

Enhanced by Zemanta

Permanent link to this article: https://back40hq.com/dry-ice-method-sealing-a-food-bucket/

Six Essential Items for Food Storage

food storage glass

There’s no point in stocking up your pantry if you don’t store your food properly. Before you buy that 25 pound sack of oatmeal or you harvest all those vegetables from your garden, think about how you plan to keep it safe for the long term. None of these supplies are particularly expensive or difficult I’ve listed these in no particular order of importance. Obviously, not everyone will use everything on the list. Find the technique or techniques that work for you. No piece of equipment is worth anything if you don’t use it.


1. Foil Pouches aka. Mylar Pouches– These thick foil bags come in a variety of sizes, and are perfect for storing most foods. Look for multilayer plastic and aluminum bags that are at least 5 mils thick. These bags will protect against moisture, light and insect infestation.

You can get the bags with a zipper top, which is great if you need to get into the bags and then quickly seal them back up. For longer term storage, foil bags should be heat sealed. While many sites say that the bags can be sealed with an iron, in order to be certain, you may want to eventually invest in an Impulse Heat Sealer. Most bags can be resealed with a heat sealer once it’s been opened.

Include an Oxygen absorber with the food before you seal the bag, this will make the bags tighter, but not rock hard. Check the seal to insure it’s tight. Store the pouches carefully to avoid accidentally poking a hole in them.

Shelf life of these pouches is around 10 years.

food storage bottles2. Glass Containers– The wonderful thing about Glass Jars is that they are easy to find and use, you can wash and use them over and over, and they are fairly inexpensive. Glass jars that have a lid and rubber seal will be airtight, so you won’t get oxygen damage. Bugs and other vermin can’t get in to glass. And because they are clear, you can easily see what’s inside.

The down sides of glass are obvious, glass fragile. If you use glass, it needs to be protected. As a Californian, I’ve learned that having the jars on shelves behind doors or screens that close securely is the best bet. (An earthquake can swing a door open and send jars flying). If you are storing for long term, you need to keep the foodstuffs in a dark place, since light can easily penetrate the glass and spoil your food.

Glass will keep food safe for 20-30 years, as long as the seal is tight.

food storage for preppers
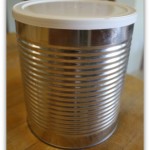
3. #10 Cans- What is a #10 can? Metal cans used by the food industry are standardized, and given a number by size. This does not mean a #10 can holds 10 ounces or 10 pounds (oddly, they hold 102 ounces). The 10 is just a number assigned to a can that is sized 7 inches tall by 6 ¼ inches in diameter. (That little can of Tomato soup you just bought comes in a #2 can).

They fit on shelves and in canning machines. You can often find #10 cans with plastic lids, like the ones on coffee cans. If you plan to do long term storage with metal cans, you may want to invest in a proper can sealer.

Food stored in cans should last for 30+ years.

4. PETE Bottles- Simply put, these are airtight shelf stable plastic bottles that juice or soda comes in. You will see the letters PETE or PET or the #1 on the bottom. Any other plastic bottle will let in too much oxygen, or leak. PETE Bottles are essentially free with your purchase of juice, which makes them quite economical. They can be reused over and over. Check for leaks by sealing an empty bottle and holding it under water. Squeeze it! If no air comes out, you can use it safely for food storage. Wash and dry the bottles completely before repurposing.

Fill them with grains or dried food, add an oxygen absorber, then wipe the edges of the lid before sealing. Keep out of the light!

Food stored in PETE bottles should last 3-7 years.

food storage buckets5. Plastic Buckets– Use BPA Free FOOD GRADE buckets that have never been used for anything except food. I know that the laundry detergent from Costco comes in great buckets, just don’t reuse them for food.

You can store bulk grains or dry food in buckets or you can load the buckets with foil pouches. Because they are rather heavy duty, buckets will keep out most pests. It is possible to find inexpensive 5 gallon buckets, but you need to check to make sure the lids are still tight. Luckily you can buy lids separately, and they come in a universal 12” size.

It’s a good idea to stock up, since the lids are the first thing to get damaged. To make things more complex, there are a few different types of lids; standard and Gamma seal. A standard lid is just that… you pound it on, and pry it off (best to have a tool for this). A gamma lid comes with a screw attachment that snaps to the bucket, then the lid screws on. Gamma lids are much easier to get on and off.

Store the buckets at least an inch off the ground for air circulation. Also, you don’t want to stack them more than three high, because you might crack the lids. Food stored in properly sealed pails, especially when the food is first sealed into mylar pouches, should last indefinitely.

6. Oxygen Absorbers– All the great containers in the world won’t preserve your food if it gets oxidized. Oxygen absorbers are little food safe packets that contain iron powder. These absorb the oxygen in the food. Use oxygen absorbers in Metal cans, foil/mylar pouches, PEET Bottles, and glass jars. These inexpensive little packets will keep your food safe.

It’s not just important to have food stockpiled for long term storage; you want to make sure that your food is kept safe for when you need to use it. Regardless of whether you choose cans or buckets, mylar pouches or jars, storing it the right way will save you down the line when you need to eat, and your food is good to go.

Prior planning and preparation prevent poor performance…..


Enhanced by Zemanta

Permanent link to this article: https://back40hq.com/six-essential-items-food-storage/

Grain Mill Review for Preppers

Wonder Junior Deluxe Hand Grain / Flour Mill by Wondermill

grain millStocking a pantry with grains is an important part of creating an emergency stockpile and for becoming more self-sufficient. But, how do you convert the grains like Oats, Millet and Rice into flour? Flour is an essential ingredient in many of our foods. We use it for baking breads and sweets, thickening soups, or as a coating for fried foods. In order to do this, we need a grain mill.

Many grain mills these days are electric. Well… if the power goes out, so does your ability to mill your grain. The hand operated Wonder Junior Deluxe Grain/Flour Mill by Wondermill is the best I’ve found for the money.

The sturdy metal body of the mill is actually thicker and stronger than other food mills. It weighs in at 10 pounds, heavy, but not outrageous. The uni-body means that there are no little plastic bits that fall or break off. Just clamp the Wondermill Junior’s extra strong nylon covered clamp to the edge of a table or counter, and turn the handle. The octagon shaped hopper holds about a quart of grain, and in 2-3 minutes, you can crank out a cup of flour. And it’s so simple to use, you can even get the kids involved.wonder mill - grain mill

What makes the Hand Grain/Flour Mill so impressive is that it comes with two heads for grinding. The stone is perfect creating for powder fine flours from Oats, Rice and Wheat. It takes just a few seconds to attach the burr head that will make short work of nuts, coffee, herbs and other oily seeds.

Use the Wonder Junior Hand Grain Mill to grind-

Grains – Oats, wheat, millet, rice and more

-Nuts- peanuts, almonds, walnuts and more (you can use it to make nut butters)

Beans– Soybeans, peas, beans and more

-Herbs- fresh and dried

wondermill hopperThis little dynamo will last for a lifetime of grinding. The special flour guide will keep the flour from flowing out all over the table. An included brush makes the Mill easy to clean. If you are handy, there are videos on you tube to show how you can rig the Wondermill Jr. to work on electricity!

If you store grains, you need a way to grind them down to flour. The Wondermill Jr. Hand Grain/Flour Mill gives you the best option for your money. Why pay more for something that doesn’t work better? And why on earth would you buy a cheaper mill that falls apart? Get the Wondermill Jr. with its lifetime warranty, and give you more options in your pantry.


wondermill grinding stoneswondermill clamp

Wonder Junior Deluxe Hand Grain / Flour Mill by Wondermill

Grain Mill Review

Enhanced by Zemanta

Permanent link to this article: https://back40hq.com/grain-mill-review-preppers/

How To Build A Survival Cache

Editor’s note: Survival caches are the ultimate back-up plan. If you are going for your survival cache, that means Plan A and Plan B went awry. In this case, you may be left with no other option but to survive with only the contents in your cache. You must plan out those contents accordingly.

Contents of a cache

Contents of a cache (Photo credit: prettydaisies)

Given the seriousness of this preparedness issue, many preppers see the value in having multiple caches spread out geographically to fall back on in order to lessen the risk of losing everything. Ideally, you want some of your caches to be away from your retreat. I read about one prepper who has multiple caches along his bug out route and has even sown edible native plants and roots along the way that he can use as an emergency source of food.

Keep these key points in mind when you begin to create your survival cache:

1) How it’s built: two ways because I have several different caches. First is out of PVC pipe with threaded ends, sealed using screw on caps; threads sealed with plumbers tape and then duct-taped on outside. Second, using locking hard cases such as those from Storm Harding. Contents determine size of box or length of tube.

2) How it’s stored: dependent on location. Buried in one case, stored in two others in the basements of people I trust. If I don’t claim the cache within X-number of days of certain pre-set events, they get to use it.

3) How close to home? Buried one is relatively close, along the path of bug out travel. Others are within driving distance of about a half-tank of gas of my bug out vehicle(s). I have three different bug out paths and there is a cache along each one.

4) Finding it: The two stored at friend’s houses are easy. The buried one is in a preselected location far away from any utilities but easily found by landmarks.  Just in case, I do have the longitude and latitude written down.

5) What’s in it: each one contains a complete set of what I deem necessary to serve basic needs of shelter, food, water, first-aid and self defense. This can get complicated to explain but I’ll do the best I can without writing a book. ”Shelter” (to me) can be as simple as a military-surplus poncho, some paracord and a few aluminum tent stakes. Or it can be a tent, or a large tarp w/ tent poles. Dependent on the size and location of the cache, I’ve tried to guesstimate my needs along that travel route and included shelter accordingly.

6) Food and water: Since it’s ludicrous to store water, I have a water filtration system and a “water bottle” in each cache. Water bottle is in quotes because in one case it’s a hydration bladder, and in the other two its collapsible 5-gallon jugs w/ taps.  Each filtration system should clean 1,000 gallons of water each. The food I have stored is an assortment of MREs and other dehydrated food, some having a shelf-life as much as 25 yrs. I have enough in each cache to feed me and my family three meals per day for three days.

7) Each cache also has a prepackaged basic first-aid kit that includes basic trauma care items (tourniquet, pressure bandages, chest seal, pneumothorax needle, etc.). The only thing we really can’t treat is dental issues (obviously there’s no field surgery stuff or vision “repair” items).

8) For self defense I will simply say that there is one folding and one fixed knife in each cache. There is also one firearm with 250 rounds for that firearm.

There is plenty of other “stuff” that could be included but in addition to the caches I have a layered and redundant preparedness plan enacted at my home.  My vehicle bug out stuff stays packed; my bug out bag stays packed; my vest stays prepared; my gun belt and weapons stay ready.

I’d like to extend my cache “reach” further, but realistically speaking, they are placed to support initial travel away from the population density of the eastern seaboard along preplanned evacuation/bug out routes. They would support me getting far enough to relax, recoup and recover, to plan further travel and assess needs.

What do you plan to put in your SHTF survival cache?

This information has been made available by Ready Nutrition

Originally published March 6th, 2014
Enhanced by Zemanta

Permanent link to this article: https://back40hq.com/build-survival-cache/

Emergency Essentials – Storing Rice

How to Store White Rice

White Rice

White Rice (Photo credit: Wikipedia)

Rice can be purchased in large sacks (20-50 lbs.) but it is best stored in smaller more manageable portions.

If you are using your rice regularly, zip lock bags stored in a dark dry place should be enough to keep your rice edible for 4 years. (Barring critter invasion)

If you are storing rice for the long term, portion the rice into Mylar bags, drop in a food safe oxygen absorber, and seal it shut. Store the bags in a food grade 5 gallon bucket. White rice stored this way could last for up to 30 years (that’s the longest it’s been studied… it’s possible that it could last longer).

As always, check your stockpiled food regularly for signs of pest or rodent infestation. They love grains.

How to Store Brown Rice

Store brown rice in Mylar Bags with an Oxygen Absorber. (When I do this, I just keep enough rice in each bag for one meal.) Keep the mylar bags in a food grade bucket in a cool dark place.

You should get a few years out of it.

Discard if it smells really off.

How much Rice Should You Store?

According to a study done by the University of Utah, each family should have 300 pounds of rice stored to see them through a year. That number sounds really high, but if you consider that many other food sources could be cut off, the rice could be a lifesaver.

Another way to look at it is that each person should have 25 to 60 pounds of Rice stored to last for a year. This depends also on eating habits and preferences.

Pests and Critters in Rice-

There are many people on the internet who warn about bugs or bug eggs in rice. These people suggest sticking your rice in the freezer for a day or so to kill off said eggs before storing it.

Consider this…. bugs lay their eggs in the ground outside, where it can get pretty cold in winter.

I’m not sure your freezer will take care of the bug problem.

Others say to zap the rice in a microwave for a minute or two before bagging it. This should kill off those pesky invaders. I’ve never had a bug problem with my rice, and I’ve never bothered with this step.

HOWEVER- If you are concerned, and you want to eliminate all worries, go ahead and do it.

Or just consider any bugs/eggs to be a source of protein.

Should You Store Rice?

Rice is a fabulous food source. It is loaded with nutrients and the energy we need to keep moving. Besides that, this chameleon food can be combined with any vegetables, beans, or meats to create a satisfying meal. Don’t forget to add Rice to your Prepper Pantry.

Emergency Essentials- Brown Rice or White Rice?

Enhanced by Zemanta

Permanent link to this article: https://back40hq.com/emergency-essentials-storing-rice/