Emergency Essentials- Brown Rice or White Rice?

Rice in Your Prepper Pantry…

Hungry Bowl with Rice for Hunger

(Photo credit: epSos.de)

When someone says, “You should stockpile rice in your Prepper pantry”, what comes immediately to mind? White rice…Brown Rice…Wild Rice? Do you have any idea how much you need? How to store the rice? How long rice will last in storage? Let me try to clear up some questions, and get you set to store rice

What are the main types of rice?-

White Rice and Brown Rice both come in these Different Types-

Long Grain– Is longer than wide, and cooks up firm.

Medium Grain– Is still longer than wide, but is sticky when it is cooked. This is the rice seen most often in American kitchens.

Short Grain– This short rice is sticky, and is often used as sushi rice.

Jasmine Rice– Long grained rice from Thailand. This rice has a nutty flavor, and cooks up firm, not sticky.

Basmati Rice– Long grained aged rice from India. Like Jasmine rice, it cooks up firm, and has a nutty flavor.

Arborio– (white rice) A short grained Italian rice that cooks up firm and starchy; it is used in risotto and rice pudding.

Wild Rice– Wild Rice is a species of Grass that is only loosely related to White and Brown rice.

What is the difference between Brown Rice and White Rice?

Brown Rice is brown because it still has the Bran in it. It also contains the germ. The germ contains polyunsaturated fat that is easily oxidized causing it to go rancid in under a year.

White Rice is rice that has had the germ and the bran polished away. Because there are no fats, white rice can be stored for long periods of time.

What is the best Rice to store for Long Term?

While I prefer the flavor and nutrient value of Brown Rice, it contains oils that go rancid quickly, and won’t work for long term storage. It can, however, be stored under certain conditions for up to two years.

On the other hand, White Rice, if stored properly is fantastic for long term storage.

There are different opinions on Wild Rice. Some say they have eaten Wild Rice that was stored for up to 8 years without noticing any difference in flavor or texture. On the package, it says to eat the wild rice in under a year.

What does that mean nutritionally?

Brown Rice contains niacin, magnesium, thiamin, iron, zinc, protein and fiber.

White Rice contains niacin, magnesium, thiamin and iron.

When you remove the bran and the germ, from Brown rice you are left with the endosperm, essentially, a starch. Don’t panic. Our bodies require starch. We need glucose from it for energy. Eating white rice will not make us fat and lazy; it means that you are giving your body fuel to perform. If you combine white rice with vegetables or beans, you will end up eating enough fiber to counteract the starchiness of rice.

White Rice is a major food source for almost HALF of the world’s population. It is a complex carbohydrate the gives us valuable nutrients. Besides that, is non-allergenic, easy to digest, and gluten free. This makes it a perfect “first solid food” for babies. Rice mixes well with other foods like beans and vegetables to round out meals and fill hungry stomachs.

Storing rice


Enhanced by Zemanta

Permanent link to this article: https://back40hq.com/emergency-essentials-brown-rice-white-rice/

Grafting Trees

grafting fruit trees
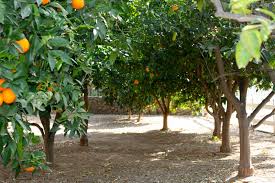
I’d like to clear up a few things about fruit trees that may be very important to any Homesteaders or Preppers who want to plant and grow their own food. I grew up in Southern California working in my father’s wholesale nursery that nursery that specialized in grafted plants, over 20 varieties of Avocados, over 30 varieties of Citrus, deciduous trees like apples and peaches, and a number of other sub-tropical fruit trees and ornamentals. My grandfather, Uncle and Cousins are also Nurserymen. Growing productive trees is in my blood.

So I am a bit frustrated by the many articles I’ve seen online lately about growing your own Avocado trees from an avocado pit, or planting apple and orange seeds to create your own private orchard. It’s probably how dairy farmers feel when they read articles encouraging people to buy a herd of cows and start a boutique cheese company. There’s a lot more to it!

In order for an Avocado, Orange, Apple or Peach tree to successfully bear the fruit you want to have consistently, the tree must be grafted. We are not talking about chemically altering the makeup of the

citrus grafting

The graft on these citrus trees can be seen down low on the trunk of the tree.

tree; this is a matter of taking a branch from a tree that has the characteristics you want, and “grafting” it to a sturdy base. Yes, a seed in the ground, or held up in a glass jar with toothpicks, will grow, and will possibly bear fruit years from now, but it won’t be what you expect it to be.

Don’t despair, you can learn to graft a tree in order to get the apples you love or the lemons you need for your special Lemon Curd. It’s a skill, much like cooking, woodworking or sailing, not only that, it is the type of skill that will be essential to Preppers and Homesteaders in the years to come.

For more information on the basics of grafting read this….

Enhanced by Zemanta

Permanent link to this article: https://back40hq.com/grafting-trees/

Prepper’s Cookbook Review

Food- How to Preserve, and USE a Food Stockpile

prepper's cookbook“The Prepper’s Cookbook: 300 Recipes to Turn Your Emergency Food into Nutritious, Delicious, Life-Saving Meals”   by Tess Pennington

If you are new to Prepping and are looking for a complete guide to stockpiling, preserving and cooking food, the Prepper’s Cookbook by Tess Pennington is right for you. The recipes are basic and good, and make great use of a Prepper Pantry. Included are recipes for filling breakfasts, easy nourishing lunches, and straightforward delicious dinners that your whole family will enjoy. The recipes make use of canned or dried ingredients, such as canned chicken, dehydrated parsley, and all sorts of beans and grains. You will also find recipes that make great use of your garden.

Beyond recipes for meals, you will find recipes for spice and seasoning mixes. I love that there are recipes for Plum Sauce and Taco Seasoning! This means I don’t have to worry about going to the store for these delicious basics.

However, this is more than just a mere cookbook. Tess Pennington teaches the basics of canning and preserving. Her instructions are clear, and easy to follow. There are charts detailing times for each type of fruit or vegetables. It’s clear that she had to learn to do this herself, and uses her successes and failures to teach others. Included are recipes for jellies and jams, a great use for fruit, and a sweet treat for your breakfast table. There is even a recipe for homemade pectin! You will also learn how to dehydrate foods, and how to make beef jerky and juice.

The book starts with the very basics of food stockpiling. How do you know how much you need? Turns out, there are calculations for that. Making an inventory list is vital.  Knowing your family’s tastes and preferences is important. Understanding how much water you require is lifesaving. Organization is the key.

My concerns about this book are that the recipes are a bit basic, and some won’t work in an off-the-grid situation. In a long term emergency, will you still have sour cream? Could you simmer a pot of soup for hours? Other accommodations like a Wonderbag or Solar Oven might have to be used. That said, The Prepper’s Cookbook does make a great jumping off place for new Preppers, and might even have some new tricks for old Preppers.

The Prepper’s Cookbook covers most everything you need to know about keeping yourself or your family fed in an emergency. Food is more than just putting calories in your mouth. Eating energy bars for days on end will bring anyone down. Knowing that you can feed yourself and the people you love delicious, filling and familiar foods will make any emergency easier to bear.
The Prepper’s Cookbook: 300 Recipes to Turn Your Emergency Food into Nutritious, Delicious, Life-Saving Meals
 

Enhanced by Zemanta

Permanent link to this article: https://back40hq.com/preppers-cookbook-review/

Basil in your Herbal Medicine Cabinet

basil

Basil is another great herb to have in your cabinet

Basil is a must for every kitchen and medicinal garden. This annual is easy to grow in the garden, or in containers. This leafy herb is bright green and looks and wonderful as it smells. Basil does grow some pretty little flowers, go ahead and pinch those off for a bud vase. Your basil will come back even stronger.

Basil Uses

Basil is an amazing herb that most people just associate with pesto. While the bright green leaves are aromatic and lend a fresh flavor to many foods, Basil can also be used as a medicinal herb. Fresh Basil is loaded with Vitamin K, and also contains Vitamin A, manganese, iron and

folate.


Read more on our Prepper Information page

Enhanced by Zemanta

Permanent link to this article: https://back40hq.com/basil-herbal-medicine-cabinet/

Paper Pot Maker

paper pot maker reviewIf you like to start your garden from seeds, you need growing containers. The problem is that most of these little pots are made of plastic… and they need to be purchased. Sure, you can use old yogurt containers, but then in the end you have a stack of dirty yogurt containers. The Paper Pot Maker will recycle newspapers or brown paper bags into the perfect sized growing post for your seedlings. And then when it’s time to plant, you can just set the plant WITH ITS PAPER CONTAINER into the ground. The paper will disintegrate back into the earth.

Paper Pot Maker

The Paper Pot maker is easy to use, just cut a strip of newspaper approximately 5 inches wide (a rolling paper cutter is perfect for this), wrap it around the wooden form, fold the bottom, and give it a twist with the attachment. Done! You’ve made a perfect paper pot. I even get the kids involved, and we can knock out a season’s worth in one afternoon.paper pot maker

Now, I know that there are DIY pot maker videos where you use a bottle or can to create the form, what makes this Paper Pot Maker so different? Well, from what I’ve seen, those require that you TAPE the bottom together to make the pot solid. The Paper Pot Maker has a divot in the bottom, and when you twist the attachment over it, the pot folds in on itself and stays together. You don’t have to plant a piece of tape.

A newspaper pot obviously won’t “hold up” forever, eventually water will break it down. However, these paper pots will last long enough for your seeds to sprout and get strong enough for transplanting. The Paper Pot Maker is a “green” solution for your seed sprouting needs.

paper pot maker
Get your Do-It-Yourself Plant PotMaker from Newspaper


Enhanced by Zemanta

Permanent link to this article: https://back40hq.com/paper-pot-maker/

Seed Swap

seed swapBook Review-
Seed Swap: The Gardener’s Guide to Saving and Swapping Seeds

by Josie Jeffrey

“Seed Swap: The Gardener’s Guide to Saving and Swapping Seeds” is a pretty little book feels good in your hands… I realize that is a strange thing to say about a book, but the truth is the layout, the illustrations and the feel of the paper made it really enjoyable to page through the book. But, people don’t usually buy a book for how it feels, they need to know if the information inside is worthwhile. Luckily, Josie Jeffrey has loaded the book with loads of important and accessible information about saving and swapping seeds.

When you preserve seeds from your garden, you not only save money, you save an heirloom variety that may have been lost to the homogenization and genetic manipulation of seeds that the large companies like Monsanto are trying to foist on us. Collecting and swapping seeds with like-minded people will insure that individuals and small farmers can continue to grow non-GMO fruits and vegetables for their table. But, how do you save seeds? How do you set up a seed swap?

This is where the book shines! The first part of the book details everything you ever wanted to know about seeds, including the various parts of the seeds, and what makes them grow. Josie Jeffrey then explains the best ways to harvest your seeds, and preserve them for the next season. It turns out that how and when to dry and store them is as important as growing the seeds in the first place. Her tips for setting up a seed swap are quite useful for gardeners, or anyone who wants to barter seeds. (You will even find a template for making your own seed packet).

The information about Seed Banks was enlightening. I was amazed to learn that there during WWII, men in the Soviet Union actually starved to death while guarding an important Seed Bank, rather than let the seeds fall into the wrong hands. There are seed banks that have been storing seeds for 100 years! Every few years they test the viability of the seeds they store, and the information they gather teaches the rest of us how to better save our heritage seeds.

The second half of the book details different types of plants, how to grow them, and how and when to harvest the seeds for maximum success. Each page focuses on one variety of vegetable, herb, and even flower. Even a beginning gardener should have no trouble collecting seeds for next year’s plantings.

If you are a Homesteader who wants to be self-sufficient, or a Prepper looking to augment your bartering stock, “Seed Swap: The Gardener’s Guide to Saving and Swapping Seeds” deserves space on your bookshelf.

Get your copy today – Seedswap: The Gardener’s Guide to Saving and Swapping Seeds


Enhanced by Zemanta

Permanent link to this article: https://back40hq.com/seed-swap/

Herbal Medicine Cabinet- Chamomile

Herbal Medicine Cabinet

Chamomile-

I love having Chamomile in my garden. This pretty sweet plant from the Daisy family, is covered with little white flowers all summer long. German Chamomile is an annual that forms a 3 foot bushy sort of plant, while Roman Chamomile is a perennial that grows low to the ground. My preference is for the German Chamomile over the Roman Chamomile, which can be bitter, but both can be used the same way.

Chamomile Uses-
Chamomile has been used for thousands of years as a go-to herb for a number of ailments. And its calming properties make it a must-have in crisis situations.


We are now adding valuable information that Preppers can use to help build the best safety net and resource arsenal possible for their homes and family. This info about building your Herbal Medicine Cabinet – Chamomile is now updated to our information page and we shall be placing more great content there in coming months. Be sure and bookmark and visit to see the new information for your Prepper Plan.

Read more on our Prepper Information Page

 REPORT
5 items   2 followers   0 votes   231 views

Herbs for Edible Walls

I have chosen the following herbs simply because they tend to be the most commonly used herbs. Of course, there are so many herbs you can grow in your own garden, so don't be afraid to try new herbs, or just new varieties of more common herbs.

1

Thyme

Feb 08, 2013
Thyme

Thyme is a lovely aromatic herb which is often used in Italian cooking.It is a relatively easy plant to grow, and works wonderfully in edible walls as it survives all year round, and will live for a number of years.

Thyme grows best in a sunny, sheltered position in well drained soil. There are a number of varieties of thyme, including Lemon thyme. This herb generally grows to about 6-10 inches in height.

Feb 08, 2013 - treebox.co.uk - 18
Parsley for Edible Walls

Parsley is perhaps one of the most commonly used herbs, and is often associated with fish, although the versatility of this herb makes it useful in a range of cookery. There are two main types of parsley, flat leaf and curly leaf. Both are ideal to use in edible walls. Like thyme, parsley needs little attention, although unlike thyme, it is biennial, meaning you will have to replace your plants every two years.

Parsley needs a rich soil in sun or partial shade, and will need regular watering, and the occasional feed.

3

Mint

Feb 08, 2013
Mint

Mint is perhaps one of the easiest herbs to grow. It is often used to accompany lamb, potatoes or peas, as well as desserts, and even cocktails. Like thyme, mint is perennial, and thrives in both sunny and shady positions. It prefers well drained, fertile soil. A word of warning, mint can be incredibly invasive, so plant the mint in a pot, then into the soil. If not, you may find that it takes over the whole pot. Both spearmint and peppermint make ideal herbs for your edible wall, with both releasing a wonderful scent.

4

Basil

Feb 08, 2013
Basil

Again, a herb often associated with Italian/Mediterranean cookery, although it actually originates from India. Basil needs a sheltered, sunny position in your garden, although it is far more susceptible to the cold than thyme and mint, which means you can really only grow it during the summer months. By removing any flowers that appear, you are ensuring that all the plants energy os focused on growing its leaves.

5

Chives

Feb 08, 2013
Chives

Chives may a lovely alternative to onions (they are part of the same family). The beauty of chives is that not only do they taste delicious, they also contain very pretty flowers, making them an ideal addition to your edible wall or herb garden. They will grow in full sun or partial shade, and need water only when they are very dry. Chives are most commonly used in salads and potato dishes.

Enhanced by Zemanta

Permanent link to this article: https://back40hq.com/herbal-medicine-cabinet/

Emergency Survival Kit for Kids

Keeping your kids safe with an emergency survival kit for kids

emergency survival kit for kidsIt’s a fact of life; I can’t spend every moment watching my kids. I really want my kids to have as “normal” a life as possible. To me, it’s important that they learn to navigate the world, and all its dangers, when I’m not there. They have school, sports, and friends that invite them for sleepovers.

Their lives are relatively “normal”.

Now, I’m not saying that I’m throwing a 10 year old to the wolves! I’ve spent their entire lives instilling values and beliefs that they take with them every time they walk out the door. They know who they are, and what is expected of them. They are strong.

They also take an Emergency Survival Kit.

My kids might be out of my sight, but they are not without resources. The standard Emergency Kit comes with food bars, water pouches, wet wipes, a whistle and a pair of Mylar blankets. Officially it’s designed for two kids. (You can decide if you want to tell your child to share). It’s enough to keep them going until I can get to them.

I did augment the standard kit a bit. I added a few small packs of dried fruit, for sweetness. A length of paracord went in, and each bag got a few light sticks in case of power out. For my youngest, I added a fabric square made from the same material as her bed quilt, to make her feel safe. A laminated card with all of our emergency information, including a photo went in too. Because the school has strident rules about knives and matches, I had to leave them out.

The kit is compact enough to fit in the small front pocket of their school backpack, or in the side pouch of a sports bag. Instead of moving them around, I bought a few for each child. Once it gets zipped into the bag, it is to be left alone! A big rule in our home is “Emergency Supplies are for EMERGENCIES only!” You don’t need to show it off… you don’t need to play with the whistle or the light sticks!

I can’t be with me kids all day every day, but I feel a little better knowing that if something were to happen, my kids have tools to survive.

Emergency Zone School Student Survival Kit

Enhanced by Zemanta

Permanent link to this article: https://back40hq.com/emergency-survival-kit-kids/

Wonderbag – Review

Wonderbag – Cooking without Power

wonder bag reviewI have to admit, I was skeptical when I first saw the Wonderbag. It looks like a bean bag chair for the pre-school set. How could it possibly cook a meal? But it turns out that this puffy bag can take the place of a long term cooker. This means using less of your fuel resources to prepare warm and satisfying meals for your family.

How does it work? You begin by preparing your food in a pot that fits into the Wonderbag. Brown the meat, add the spices and flavorings, add any liquid, and then bring it all to a boil. Once the food has boiled for a few minutes, simply remove it from the heat source, and tuck it into the bag on a trivet. There is a padded piece that sets on top of your pot, and the bag is closed up with a drawstring. 1 – 5 hours later, your food is ready, just like you cooked it in a slow cooker or Dutch Oven! Only, you didn’t have to use any electricity or firewood.

Since the Wonderbag cooks the food safely, you don’t need to worry about monitoring your meal. It won’t burn or need more fuel. This frees up your time to take care of other important tasks, and as you know, there is ALWAYS something that needs to be done.

The Wonderbag was developed in South Africa so women could cook for their families without spending half of the day searching for firewood or polluting their air with kerosene smoke. Not only was this a revolution in food preparation, it also freed women up to spend more time with their families… teaching their children, or working home businesses to earn a living.

We use the Wonderbag as an easy cooking method in power out emergencies. I prepare the food using a camp stove, and once it’s boiling, I can turn the stove off, and let my food finish in the Wonderbag. My husband also loves to take it along when he’s tailgating. I prepare my Shredded Beef Brisket or 3 Baked Bean Casserole, and the food stays warm and delicious for hours in the bag. (He likes that it saves space on his grill). It’s good for savory stews and soups as well as rib-sticking oatmeal breakfasts. I’ve heard some people have even tried baking in it! And because the bag is thoroughly insulated, it can be used to keep foods COLD. If your freezer goes out, you can put frozen items into the Wonderbag, where they will keep frozen for hours, much like a cooler. (My daughter also likes to use it as a pillow when she’s reading…)

Any 2-9 quart pots with short handles and a lid will fit into the bag. You can even use it with your cast iron pots. The bag comes with a few recipes to try, so you can get used to using it. Different foods have different cooking times, so be sure to look at the chart before starting! A warm meal does wonders for morale in times of crisis. Consider adding a Wonderbag to your emergency stockpile.

wonderbag cooking times

Wonderbag Portable Slow Cooker with Recipe Cookbook, Red Batik

Enhanced by Zemanta

Permanent link to this article: https://back40hq.com/wonderbag-review/

Storing Oatmeal – Ideas and Recipes

Oatmeal

Oatmeal (Photo credit: desegura89)

Why Store Oatmeal?

Anyone who stockpiles or stores food should have Oatmeal, and not just for breakfast.

-Oatmeal makes a filling meal to start your day. It can even be prepared with little or no energy in a Dutch Oven or Wonderbag should the power go out.

-Oatmeal can be used to stretch ground meat.

-Oatmeal can be added to baked goods to stretch the flour and add flavor as well as nutrients.

-Oatmeal can be ground into flour with a grain mill.

-Oatmeal is higher in protein than wheat.

-Oatmeal allows you to make your own healthy granola bars.

-Serve with sweetened condensed milk for a sweet treat.

-Oatmeal doesn’t have to be sweet… it can be served as a savory side dish, or even a focal point of a meal.

Savory Oatmeal Ideas- (Best with Steel Cut Oats or Old Fashioned Oatmeal)

-Add soy sauce, green onion and a bit of sesame oil to prepared oatmeal.

-Chop bacon into bits and fry until crisp. Cube squash into tiny pieces and cook in the bacon fat.

Serve over oatmeal with lemon, salt and sage.

-Make oatmeal with cream, then top with lots of Parmesan cheese, black pepper, bit of salt,

some olive oil and an egg (poached or fried sunny side up).

-Mexican Oatmeal- make oatmeal, then add Corn kernels, cojita cheese (or Monterey jack),

scallions, peppers, cilantro, chili, lime juice and salt.

-As a Risotto Substitute-
Oatmeal and Mushrooms (for two)

` 8-10 Mushrooms, Sliced (I prefer Oyster Mushrooms, but Criminis work well)

1 Tbl Olive Oil

½ cup Chopped Red Onion

2 cups COOKED Oatmeal

Few Tbl. Parmesan Cheese

salt and pepper to taste

In a pan, heat up the oil, and then sauté the onions 3-4 minutes, stirring until

translucent. Add the sliced mushrooms, sauté a few more minutes until they are soft.

Add the oatmeal, and stir until it is heated all the way through. Top with Parmesan

Cheese. Turn off the heat, and stir until the cheese is melted. Add salt and pepper.


Sweet Oatmeal Recipes-

Of course, Oatmeal is perfect for breakfast. Waking up to warm cinnamon goodness starts the day off

Apple Cinnamon Oatmeal

(Make in your Slow Cooker or Wonderbag )

5-6 servings

1 cup steel cut Oats

3 cups Milk (soy or almond Milk will work)

½ cup brown Sugar

2 Tbl Melted Butter

1 tsp Cinnamon

1 ½ cups peeled chopped apple (about 2)

½ cup dried cranberries

2 cups water

Put all of the ingredients in a slow cooker or a pot.

-if using a slow cooker, cook on low for 6 hours

-if using a Wonderbag, bring to a boil, then put in the Wonderbag to finish overnight

Serve with more fruit or nuts, maple syrup or sugar.


Pumpkin Oatmeal

(Make in your Slow Cooker or Wonderbag)

1 ½ cup Steel Cut oats

4 ½ cups water

1 cup pumpkin puree

¼ cup Brown Sugar

2 tsp. Vanilla Extract or Vanilla Sugar

2 tsp. Pumpkin Pie Spice (or 1 tsp Cinnamon, 1/4 tsp cloves, ¼ tsp nutmeg, ¼ cup ground ginger)

In a Slow cooker, stir all ingredients together and cook on low for 6 -8 hours

In a Wonderbag, stir the ingredients together in a pot, bring to a boil, then place in Wonderbag

Overnight.

Serve with more sugar if needed.


Storing Oatmeal – Ideas and Recipes

Enhanced by Zemanta

Permanent link to this article: https://back40hq.com/storing-oatmeal-ideas-recipes/